A Project is defined as an Application that will be supported.
Create Project: #
- Click on “Create a Project” in the Summary Page

Pop up window will ask for Project details:
- Name of application that will be supported. This name will be referenced in the Connection later on.
- Test suite framework that will be supported.
- For example, Cypress, Playwright, Selenium, etc.
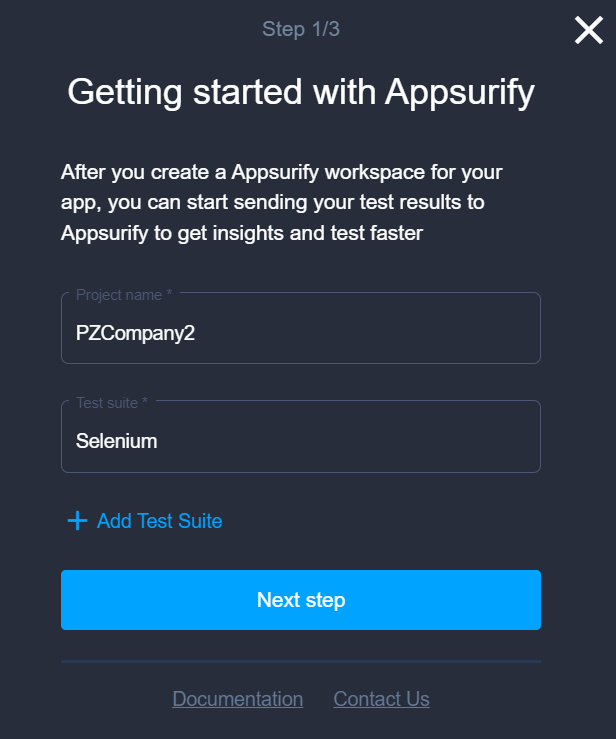
Once Complete, a Green Popup should appear in right hand corner of screen Confirming the new Project was Created.

Next Pop up window will allow you to add your team memberes to the Project. You can also Skip this step and do later under “User Admin” on top right corner.
Note: You cannot add a New Member here until that New User has been added into the Account by the User Admin.
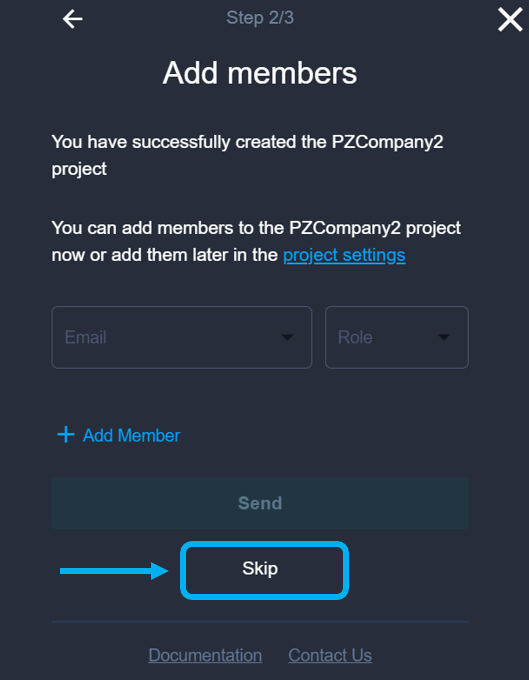
You can add new Users to created projects at a later day easily once they’ve accepted the email invite to be added to the Account.
Select Repository Connection Type #
With “Script” selected and underlined, click SAVE to confirm
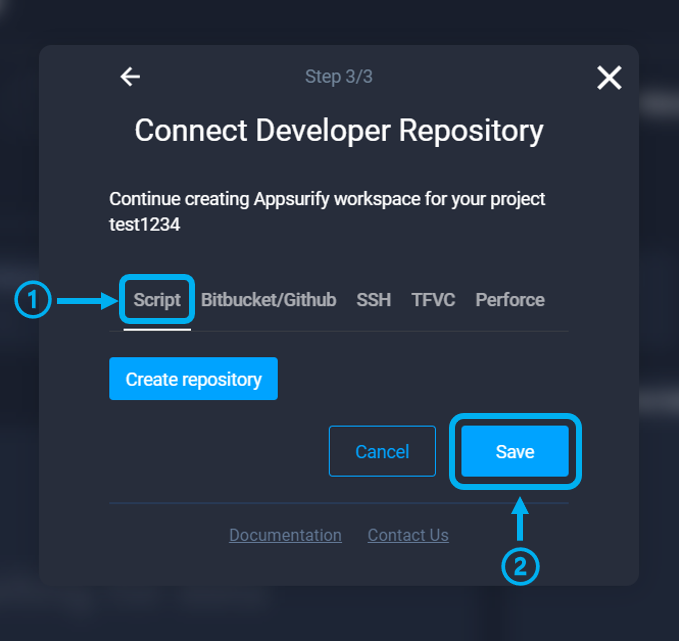
Unless directed by the Appsurify Team, select “SCRIPT” as the Repository Connection type.
NOTE: Important to Click the SAVE button to designate the Repository Connection Type.
Click through next Pop ups and Finish
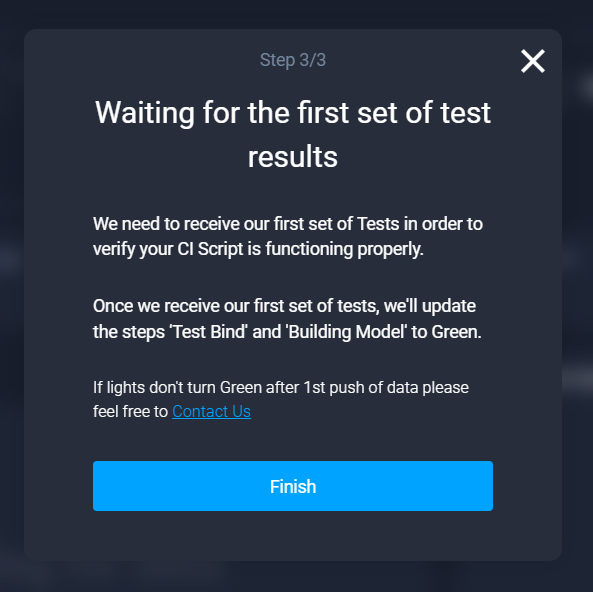
Great work! You’ve set up your Project – now it’s time to Connect your Repository!


